Custom Punchouts and Card Stock
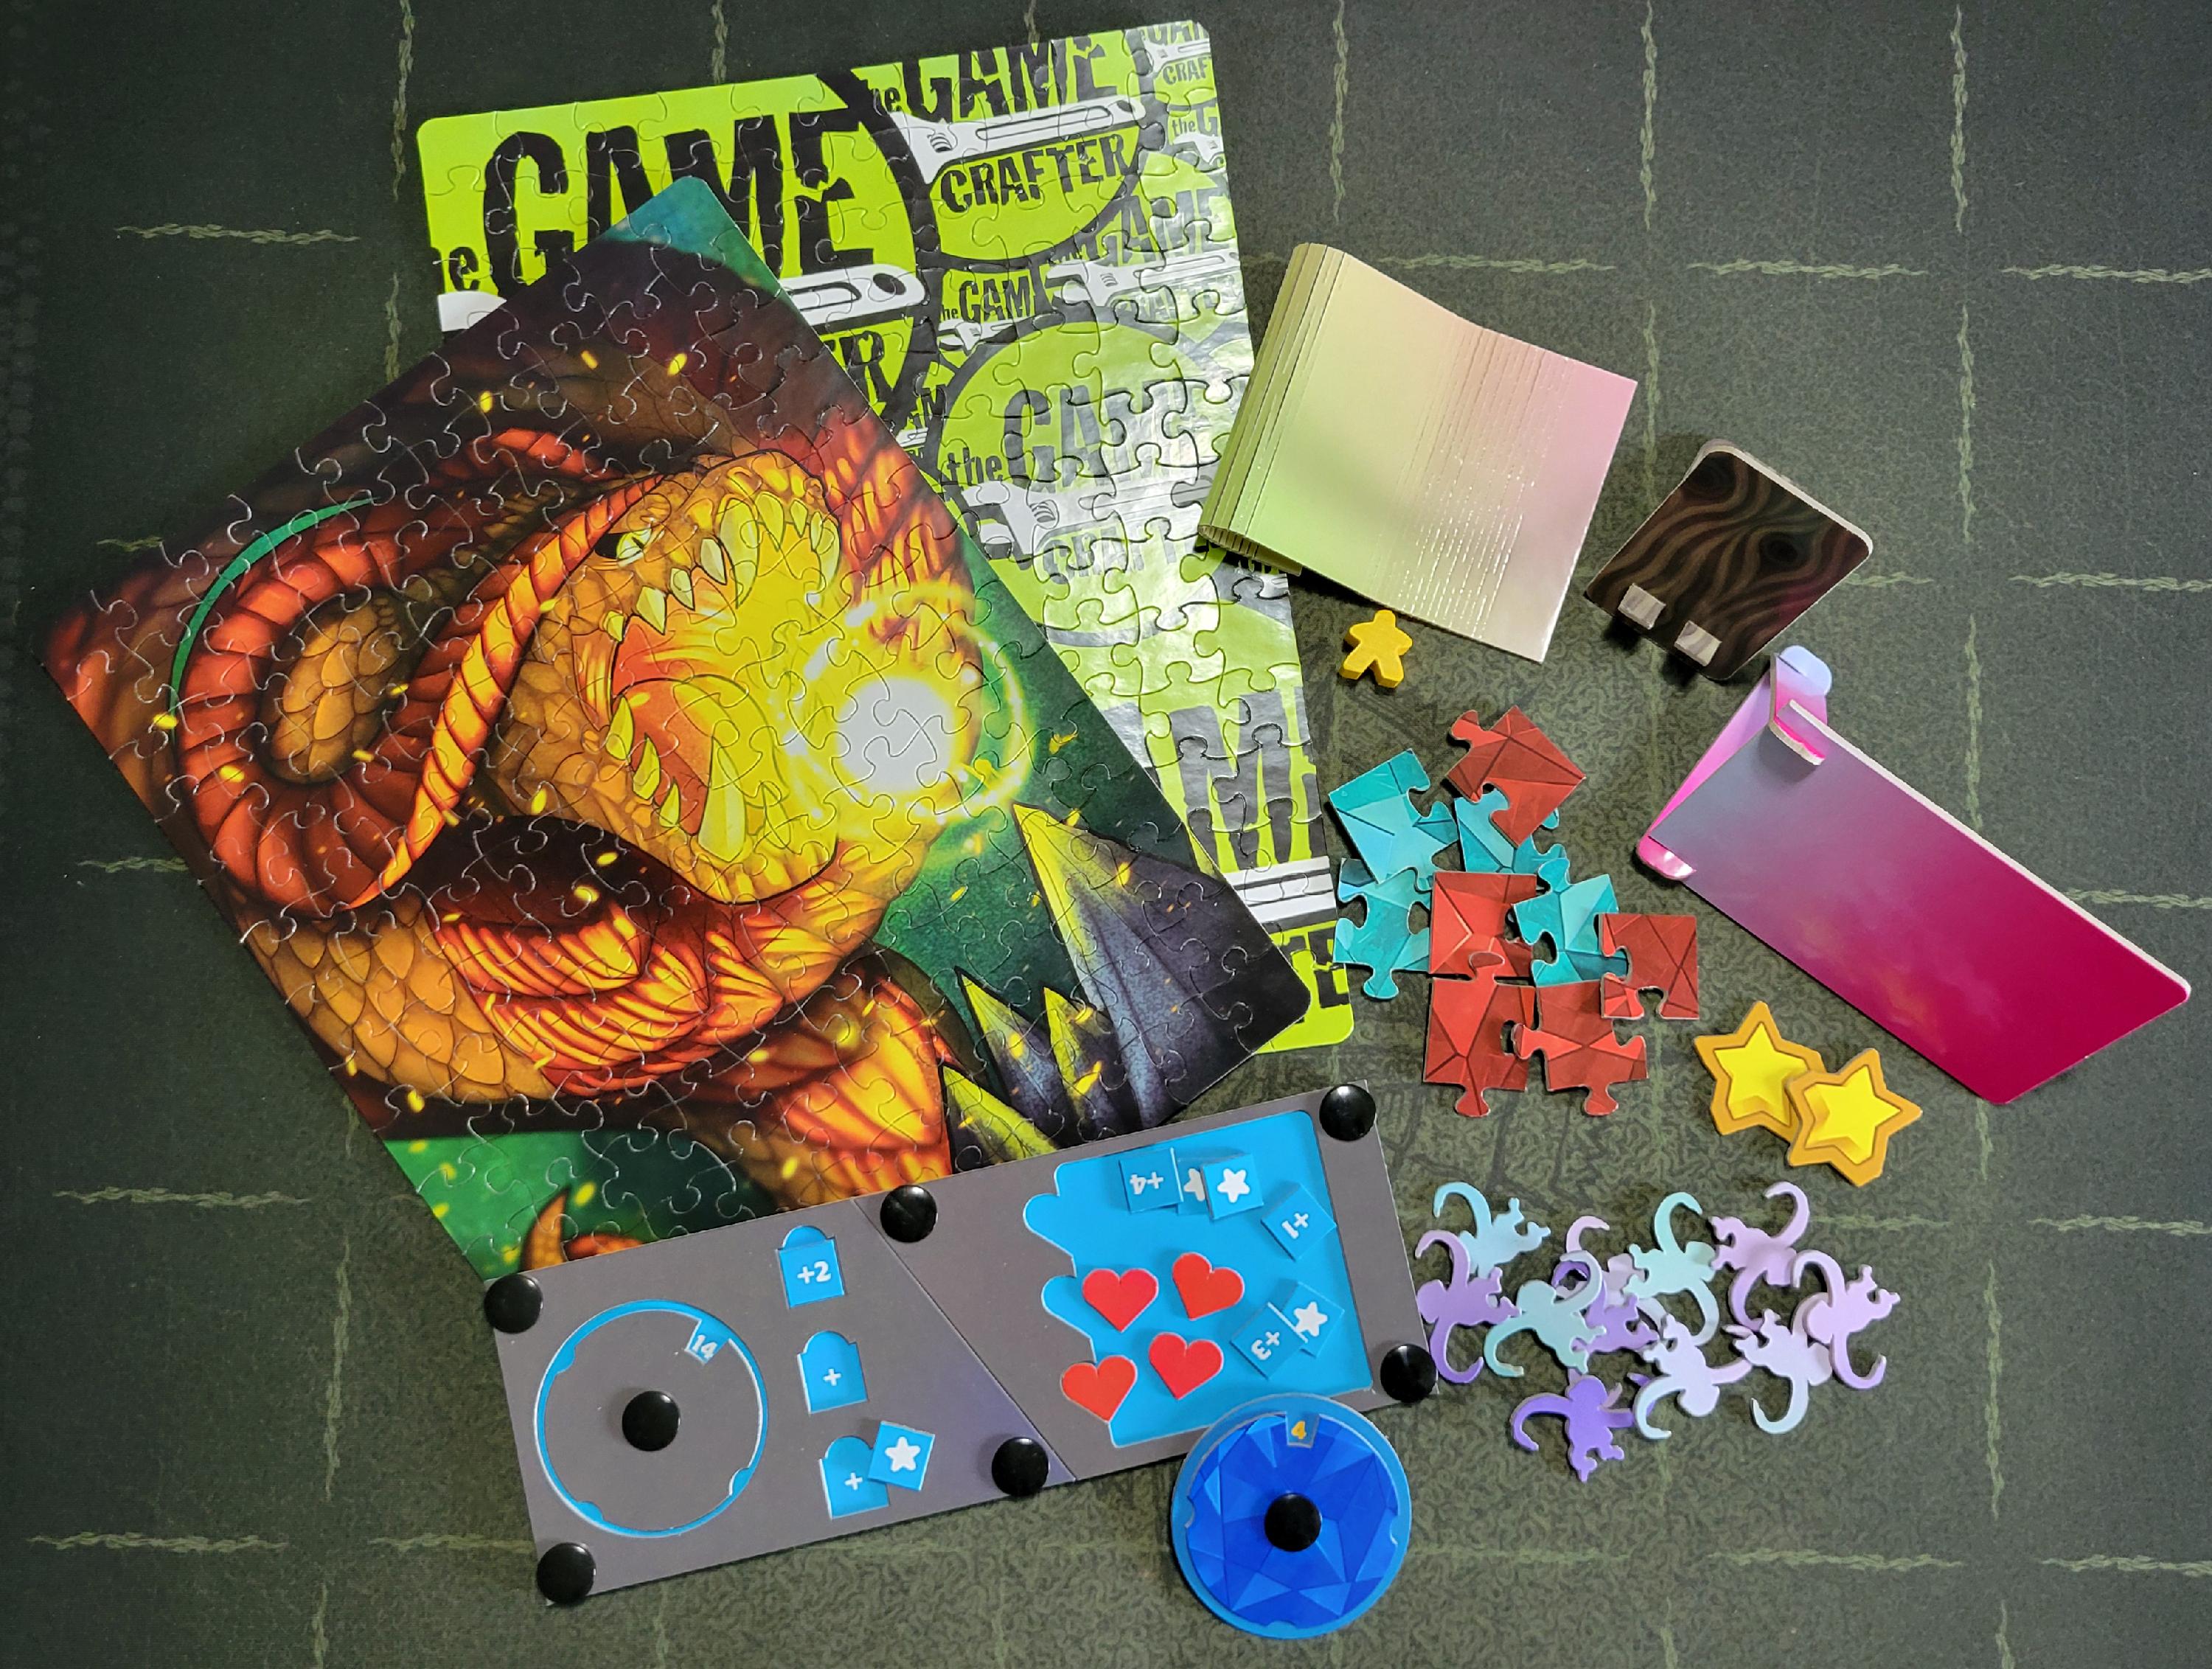
With custom punchouts and cardstock, you can design your own shapes to be cut. You choose the size of the slug you want to use, and then create the artwork and the cut lines! For the first time, you can have truly bespoke game pieces in a print on demand game. All custom punchouts are printed and made of 60 point (0.07 inches) thick chipboard. All custom card stock items are printed and made of 12pt 320gsm black core card stock.
The slug sizes for custom punchouts are 3.25" x 5.25" for small, 8" x 4.5" for medium, and 8.25" x 10.5" for large. The slug sizes for custom card stock are 2.5" x 3.5" for mini, 3.25" x 5.25" for small, 8" x 4.5" for medium, and 8.25" x 10.5" for large.
Definitions
- Sheet - The material being cut.
- Slug - A subdivision of a sheet. For example, on small punchouts there are 10 slugs to a sheet. (You can fit as many custom shapes as you like onto a slug, as long as they are within the Safe Zone and there is 1/8" between cut lines.)
- Cut Line - A vector line drawn representing where the cut is made into the slug.
- Part - An individual component within a slug that will be used by the game once cut.
- Nick - a gap in the cut line that allows the part to remain attached to the slug after cutting.
- Tie - The piece of material that is left over due to a nick.
Requirements
All cut lines must have at least 3 nicks, evenly spaced around the shape. These nicks should be .01” wide for custom punchouts, and 0.03" wide for custom card stock. If cutting along the safe zone, additional nicks (one every 3") should be added to reduce the chances your shapes breaking free from the slug when cut. The nicks will leave ties to the slug that will keep your part from falling out of the slug.
Nicks are required on any shape you cut out, whether you wish to keep it or not. Any parts without them may be lost, and your order may be delayed pending new cut files if you create punchouts that do not include nicks (due to the issues this causes during the production process).
Do not add cut lines to the image for the slug, they will be added automatically.
Note that the punchout slugs are not full bleed. You will need to keep all cut lines and important parts of the image within the blue dotted Safe Zone line (which is 1/8" from the edge of the slug).
Custom punchouts cannot be purchased without any cuts. You will be required to include a cut somewhere on the slug within the Safe Zone. A member of our TGC community has created cut files at the Safe Zone for all custom punchouts and custom cardstock sizes. You can find them for free at https://www.thegamecrafter.com/design-assets/svg-edge-cuts-for-all-sized-custom-punchouts-and-cardstock,
How to Make Custom Punchouts or Card Stock in Illustrator or Inkscape
Adobe Illustrator often exports SVG files at 72 DPI while Inkscape exports at 96. While this video specifically mentions custom punchouts, the process is the same for creating custom card stock items acrylic and stickers.
Next, watch the video below to learn how to optimize your files in Illustrator for cutting. While this video specifically mentions custom punchouts, the process is the same for creating custom card stock items (except for the nick width, which should be 0.02" for custom card stock).
How to Organize Slugs with Custom Punchouts
Special Features
There are a number of special cases you may want to be aware of.
Tips
Join lines wherever possible to have one continuous path rather than small segments of line. This will yield a higher quality edge.

Order your cut lines so that they happen one after the other. Making the cutter go back to an area it has already cut will slow down the process, and will cost you more money.
For optimizing your SVG file, you should assume the cutting starts at 0,0 (the top left).

Notes about SVG
SVG or Scalable Vector Graphics is the file format that we use to define cut lines for custom punchouts. It is a vector format, which means that the image is defined by lines rather than by pixels. Vectors are created by programs like Adobe Illustrator and Inkscape, where as programs like Adobe Photoshop and Gimp create raster files, or files defined by pixels.
SVG was first designed for screens, not for manufacturing, so it has a few weird quirks. The most notable of them is that vector programs don't have the same meaning for lengths. For example, an inch is 25% longer in Inkscape than it is in Illustrator. This is because behind the scenes both programs use something called User Units to define their shortest length. User units are best thought of as pixels or dots. When you upload your SVG file to The Game Crafter, our software will ask you how many dots per inch (or DPI) are defined by the program you used.
Note that you should only create cut files using vector graphics software. Other types of programs may be able to create vector files, but the files may not be created or formatted correctly for use as cut files. We provide software suggestions and more information in our Help articles at https://help.thegamecrafter.com/article/31-design-tools and https://help.thegamecrafter.com/article/198-types-of-software
When you export an SVG file for our cutting system it cannot have any bitmap/raster images embedded in it (even if they are hidden). Make sure you delete those layers before generating the file to upload.
Opening Templates in Inkscape
Inkscape has a default DPI of 96, while Illustrator has a default DPI of 72. The SVG templates on the site will be 72dpi, unless stated otherwise (indicated by a 72, 90 or 96). This means that if you open an SVG template and the size seems wrong, you may need to update it manually to reflect the correct size.
If you go to the product page, look for where it says "Image Size" under Stats.
 The image size listed is the size the final image needs to be in pixels. Because you are using a vector program, I recommend using a measurement like inches instead. The pixel image size is representative of 300dpi. To find the inches of any "Image Size" divide the pixels by 300. In the above example, that gives us a file size in inches of 3.25 x 5.25 inches (Note that the "Finished Dimensions" will not always match this number).
You may need to adjust the safe zone as well. The safe zone will always be 0.125" from the cut line (if there is a visible red cutline), otherwise it will be 0.125" from the edge of the document. The safe zone is always 0.25" smaller than the cut area. For example, if the file size is 3.25 x 5.25 for a custom punchout (no visible cut line), than the safe zone is 3 x 5 inches. For something like a Dual Layer Board (8.25 x 10.25"), which has a visible cut line, the save zone would be 0.25" smaller than the cut line (cut line = 8 x 10, safe zone = 7.75 x 9.75).
Update your Document Properties reflect this size. You can do this under File > Document Properties. The update the template graphics as well.
When saving, the SVG cut file can be any DPI, it just needs to be the correct aspect ratio. However make sure to save your image files at 300dpi.
How to Make Custom Punchouts or Card Stock in Inkscape
Before you create a set of cut lines in Inkscape, go into Edit > Preferences and select "Tools". There, select "Geometric bounding box" rather than the default of "Visual bounding box". If this is not done, then the outer thickness of the lines drawn will be factored into where things are cut. However, our cutting systems measure from the center of the line, regardless of its thickness. Therefore, Geometric bounding box will solve this problem.

When creating a new document in Inkscape, if you are not using our starting template, set Default Units and Custom Units to Inches.

If using Inkscape on a Mac, be sure to go into XQuartz Preferences and disable Pasteboard syncing. If this isn't done, then when copying a vector, it will automatically turn into a bitmap, destroying the cut lines.

Adding Nicks and Optimizing your SVG
When creating your SVG, you can add nicks and optimize them using the program you created the file in, or there is another option you can also use--namely, svg.zovu.co/. You can also use this tool to check your SVG file to make sure it has the proper nicks, and is fully optimized.
First, drag and drop in your SVG.

Then, select "Split Object into Equal Parts". If you have a complicated shape, you may want to use "Split at Point" instead.

Select the number of sections, and the width of the nick. The settings used here are great for chipboard.

Select a path number, and then click Split.


Repeat this for all paths.

Once done, click the menu, then Auto Sequence.

Move the slider to the left for more complicated designs, and to the right for simpler ones. Then Click Start.

Once it runs, save your SVG, and you are ready to upload it to The Game Crafter.
